

Welcome back to our guest blogger Annalisa Jackson for part two in her introductory series on photography!
Part Two: Lenses, getting to know the eyes of your camera by Annalisa Jackson.
Disclaimer: I am not a professional photographer though I am studying to be one. This is an introduction to cameras and photography for somebody starting right out and may be of less interest to experienced photographers, who may actually turn puce and run screaming for the hills at my words.
Hello again and welcome to part 2 of this blog series introducing you to the world of photography. Today’s blog is about lenses. Nope not contact lenses, camera lenses. Similar properties but harder to put in your eyes. The camera lens is like the pupil in the eye of the camera. They usually look like this
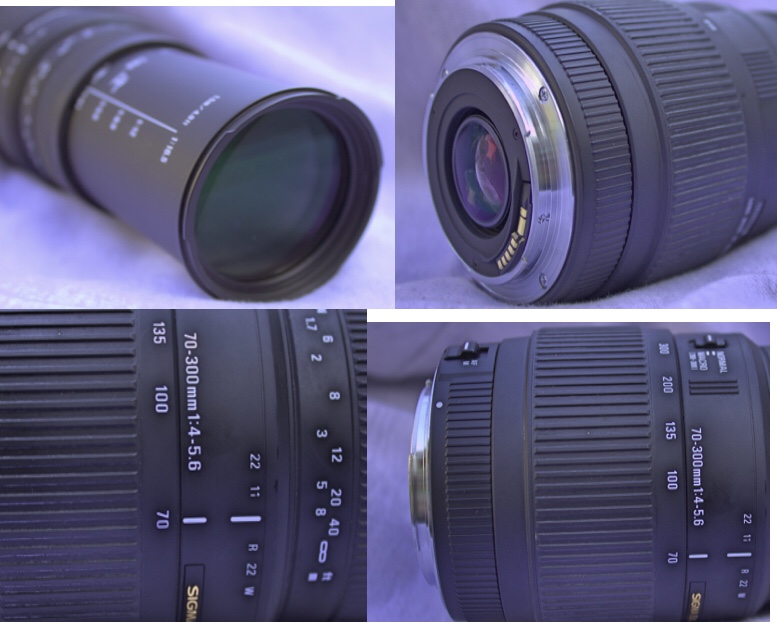
They can look a little confusing with all the numbers and dials but are not too bad once you get to know them. They honestly don’t bite, (well except that one time but after a few shots of vodka I am reasonably sure I was just having a nightmare). At the back of the lens the gold bits are the electronic contacts to communicate with the camera. There is usually a red dot you align with the same one on your camera and twist to connect. Most brands like Nikon or Canon have their own lenses, but then you can buy ones from companies like Sigma which are made for a variety of cameras. Be aware if you are buying one of these to check that you are buying the correct fit for your camera. The markings on them can look daunting but I have broken them down for you below
Lens Markings
• Firstly, you may find your lens is marked with 2 letters, this denotes image stabilisation to help reduce camera shake. The letters vary by manufacturer but are: Canon – IS (image stabilisation), Nikon – VR (vibration reduction), Sigma – OS (optical stabilisation), Pentax – SR (shake reduction), Tamron – VC (vibration compensation) and Sony OSS/SS/SSS (optical/super steady shot). These are usually on a switch to enable you to turn this function on and off. There is also a switch marked AF/MF. This will enable you to switch between auto focusing by the camera or manual focus, where you can adjust the focus rings yourself to your needs. My lens above also has a switch to turn it into a macro lens at a longer focal length so I can photograph small objects from further away, which is useful for not scaring small subjects such as insects, or blocking my own light when I try to take the shot.
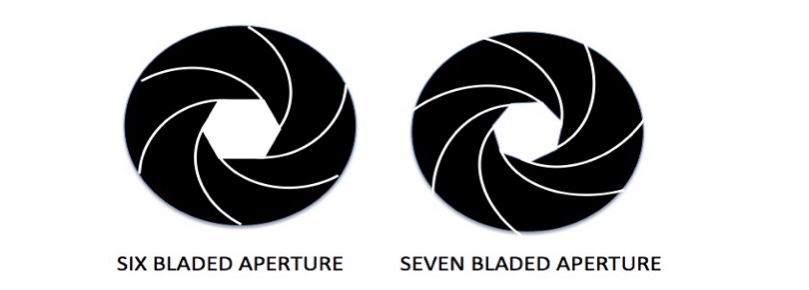
• Secondly, there are normally numbers around the lens which may vary depending on your lens from 1.8 to 32. Some lenses now go down to 0.5 but this is very unusual. These are your aperture numbers. Inside the lens are a series of ‘blades’ which are shaped like a dinosaur tooth – in a curved triangle. Depending on the quality of the lens the material varies though it is usually metal. In the early days of photography many more materials were used such as Ebonite, which is a material made by vulcanising rubber for car tyres with a higher level of sulphur than car tyres would usually be treated with. As it is essentially what a bowling ball is made of, and is brittle and discolours when exposed to UV light, thankfully it is no longer used. However I digress. These blades are arranged in a circle with the points facing inwards. Depending on the lens different amounts of blades may be used from as little as 5 to upwards of 11. They form an adjustable opening in the centre which is your aperture, which can widen or narrow like the pupil of an eye. The shape of this hole varies depending on the amount of blades and how open they are
• The size of the opening is measured in f-stops and, confusingly, the bigger the f-stop number the smaller the aperture opening. This will be discussed in a later blog on exposure and aperture but for now its enough for you to know these are the numbers you see around the lens.
• Thirdly, the numbers measured in millimetres are your focal lengths. The focal length of a lens is the point, measured in mm, from the sensor where the image comes into focus. So a higher focal length is more zoomed in as it is further from the sensor, where a lower focal length is more wide angle. If there are two numbers such as 70-300mm, then the higher the difference between the two numbers the greater the focal range of the lens.
Lens Types
There are two primary lens types. The first is your zoom lens, which are the ones marked with 2 numbers. These have a range of focal lengths and can be zoomed in or out on a subject. The second is your prime lens. These have a fixed focal length. They come in a variety of lengths. The most popular tends to be 50mm. You might be asking ‘why would I buy a fixed length lens, when I can buy a zoom lens that allows me to do the same thing as multiple prime lenses?’ Good question, and the answer is basically, that while zoom lenses are versatile pieces of equipment and great for a range of photography, prime lenses tend to be higher quality and have a wider aperture range. This allows more light into the picture and are great for lower light situations. They also force you to look more creatively at a subject due to the fixed length. Zoom lenses come in a variety types including
• Normal/Standard
• Telephoto
• Super telephoto
• Wide angle
• Super wide angle
• Fish eye
How these vary is how much of the periphery of the picture is in focus. Human vision has a roughly 130 degree angle of vision, although only 50 degrees is in focus, so looking at a scene in front of them the human eye would see 50 degrees in sharp focus, plus 40 degrees either side in blurred focus, then nothing from 130 degrees onwards. When you use a lens it captures a picture the same way the human eye would with a sharp section in the centre. The further you zoom out the narrower this sharp section tends to be and as you reduce the focal length the wider it tends to become, almost like a fan effect. A fisheye lens can capture up to 180 degrees of the scene around but due to the large amount of the scene in the picture the image will look distorted. The focal length determines the type of lens you have
• Super telephoto 300mm +
• Telephoto 100mm+
• Mid range 50-100mm
• Wide angle 10-40mm
• Extra Wide angle < 24mm
• Fisheye 8-15mm
So which lenses should you start out with? Well when I bought my 1st DSLR it came with 2 variable length lenses. One was a standard range lens with a focal range of 18-55mm, with an image stabilisation switch and wide to mid range ability. The other is the one pictured above ,with a focal range of 70-300mm giving me mid range to zoom capability. I have to say for starting out it was a pretty good combination giving me the full range I needed, since I wasn’t doing specialist photography at the time that would require extreme zoom or extremely wide angles. They were also reasonable for macro photography and, most importantly to me at the time, affordable. Here is a very important PSA – lenses are expensive. More specifically GOOD lenses are usually expensive. So for your every day photography needs these stock lenses are probably enough but if you want more be prepared to invest a fair bit of money.
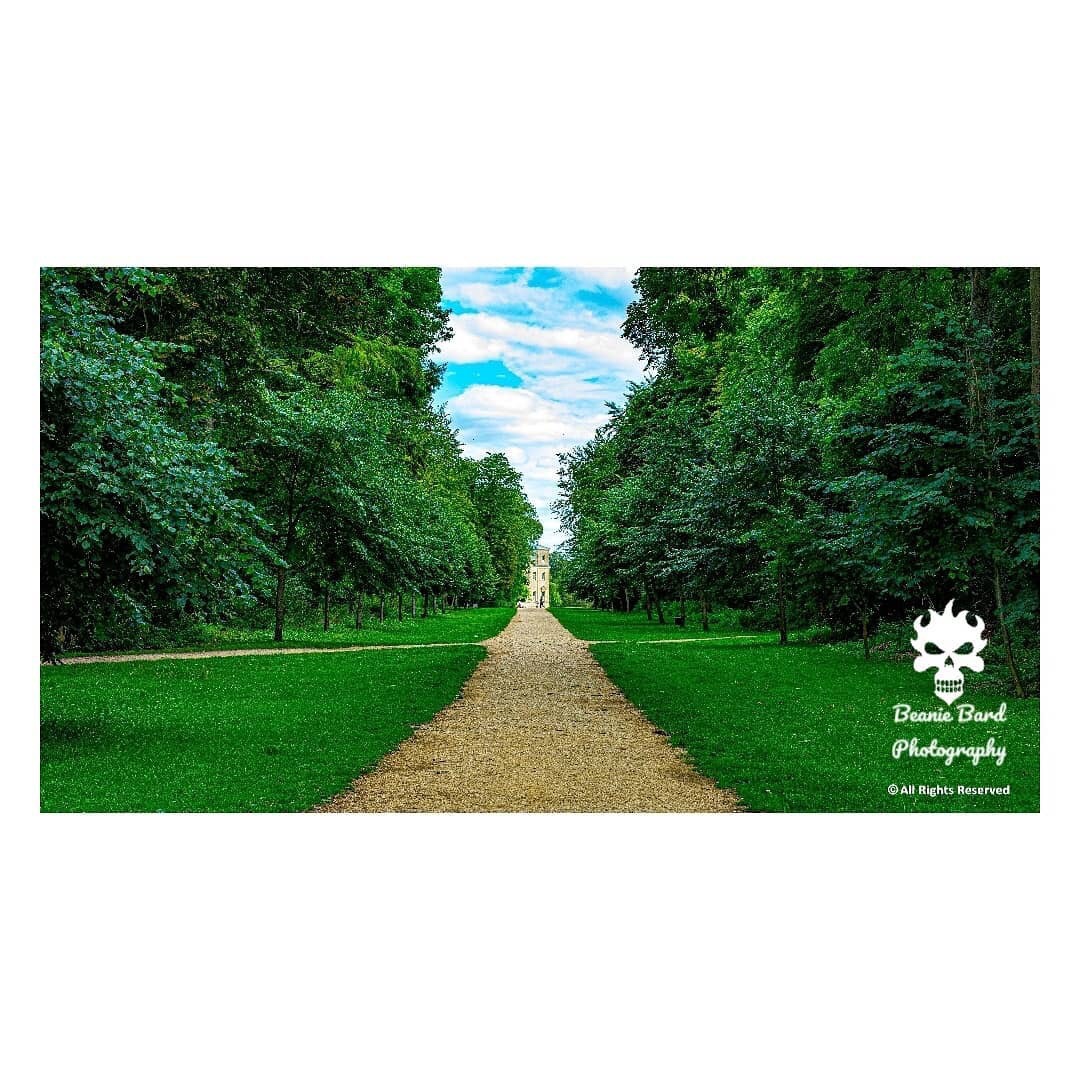
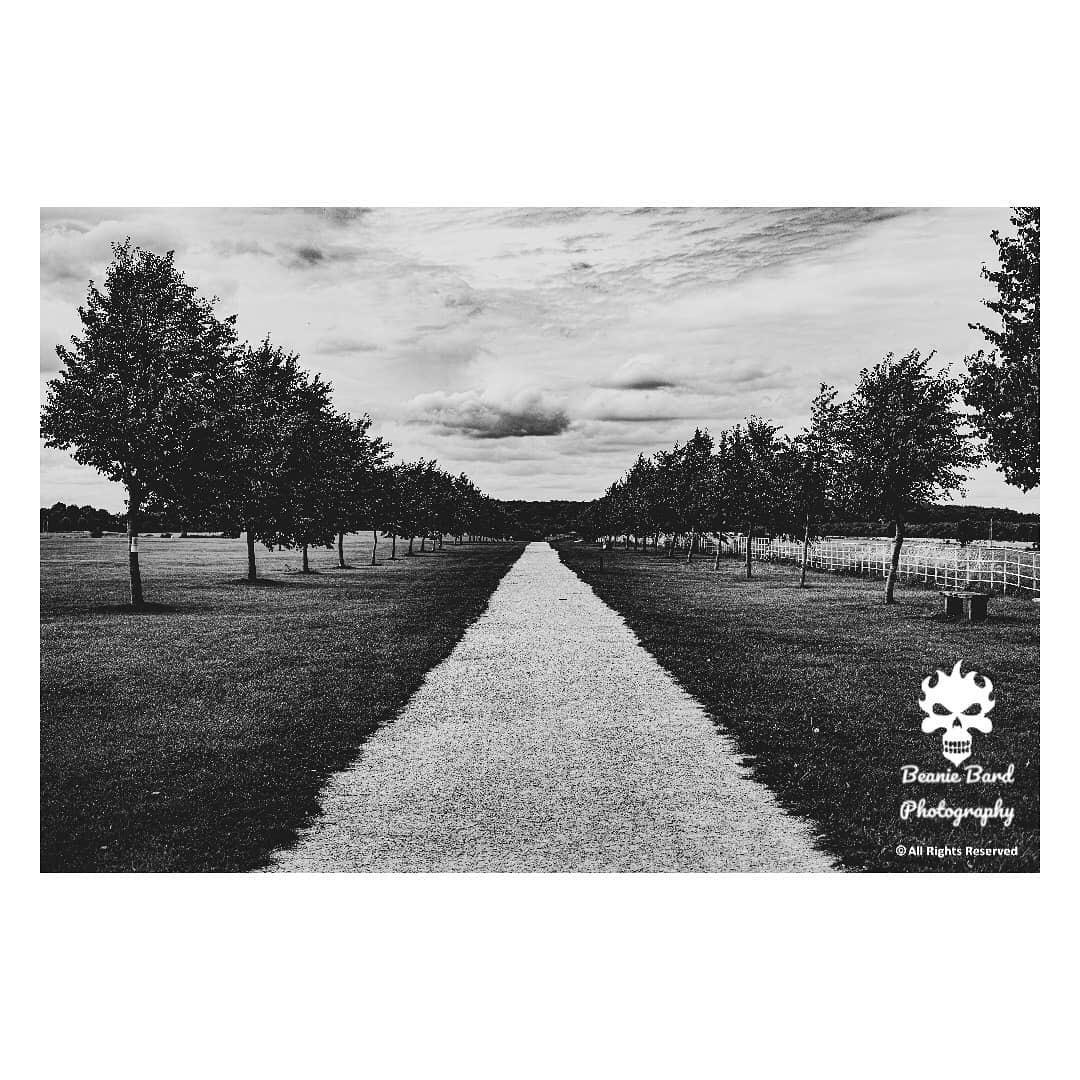
However, I can also highly recommend a 50mm prime lens. The 50mm lens basically has the same range of focus as the human eye so it gives you an interesting perspective to your photographs. Being a prime lens they are also much, much sharper. Below are a couple of photos I recently took with my 50mm lens that shows a fixed focal length is not a bind
Once you have a decent couple of lenses for a wide range of shots and a nice prime of 50mm or maybe 70mm, which is also quite versatile, if you decide to move into photography more deeply then you move into the realm of your lens choice being decided by the photography you like to do. I love macro so have recently invested in a 105mm macro lens. I also love street photography so am saving up for a 35mm lens which is unobtrusive, will capture plenty of the scene around me and bring me closer to the subjects I am photographing. If you want more unique shots you could look at a fisheye which I often see used for city shots. If you decide portraiture is for you then 85mm is a popular choice, and if you want to photograph wildlife then you begin to move into the realms of 200mm primes and above. The subject of lenses is one which could make a significantly longer blog post but your best bet is to read and research your needs, speak to other photographers and speak to your local specialist camera shop before you make your decision as there are so many options out there. The great thing however, is that there are so many options out there. Your limits are only defined by you not your lens. Happy snapping
Follow Annalisa on Facebook
